

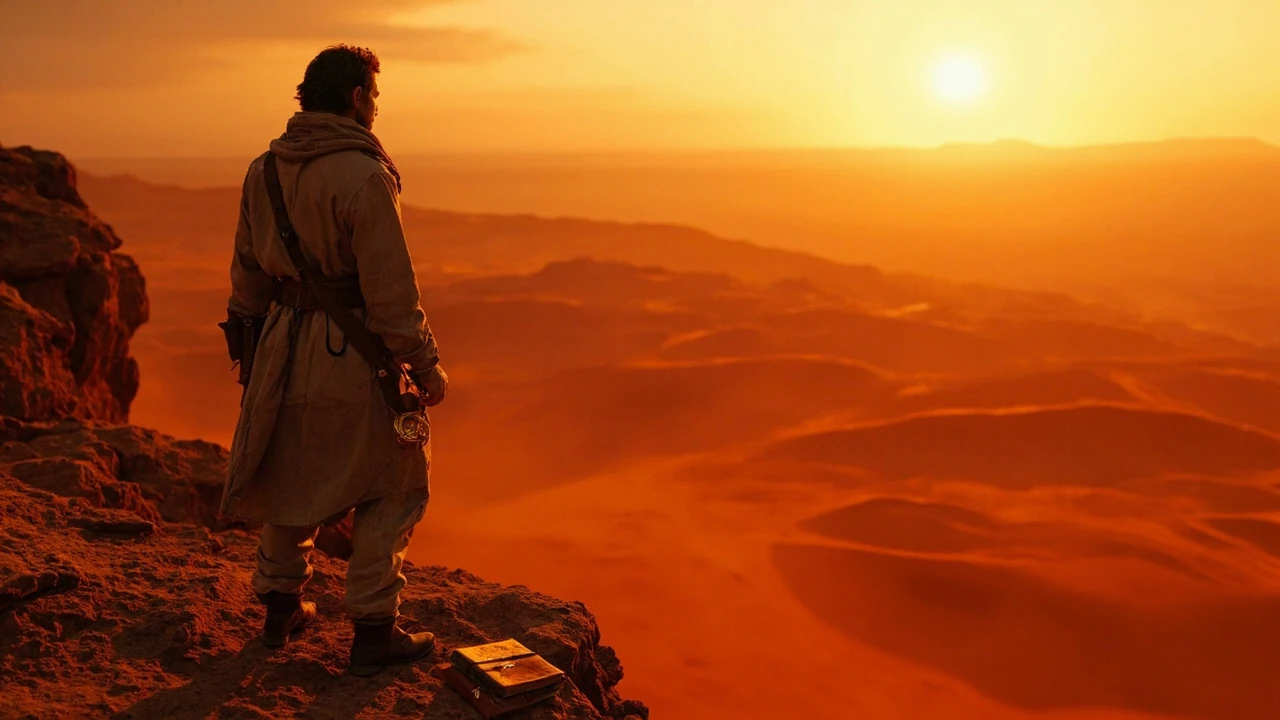
Precipice of truth in Crimson Desert and what players actually face
Precipice of Truth sits inside Crimson Desert as one of the main-story missions that pushes Kliff’s journey into the contested lands south of Hernand. Like the other named chapters, it blends travel, scripted story beats, and a defensive objective that the game treats as a soft checkpoint for the player’s combat and resource planning. Pearl Abyss built the quest so that you cannot skip the traversal between camps, which means the mission doubles as a stress test for the gear and rations you have been stockpiling since Pailune.
This walkthrough is written for a player who already cleared the Hernand arc, has at least one upgraded primary weapon, and wants to understand where the mission sits in the broader campaign before they commit to a long ride. We will cover the quest triggers, the order of named encounters, the combat phases that most players fail on a first attempt, and the story beats the quest is designed to deliver. We will also flag the design choices that the developer visibly made when shaping this chapter, because the mission’s pacing tells you a lot about how Pearl Abyss expects players to move through the open world.
If you are looking for a quick completion route and nothing else, jump to the section on the final stand. If you want the full context, start here and follow the page in order.
Quest prerequisites and how the mission unlocks
Precipice of Truth does not appear as a free-standing quest marker the moment you finish the previous chapter. The game uses a soft gating system in which the quest becomes available only after several world-state conditions are met, and the tracking UI shows the prerequisite list the first time you talk to the relevant handler in camp.
Before the quest becomes available, the player needs to satisfy each of the conditions below. They are not optional, because the mission’s opening cutscene references the camps and contacts by name.
- Complete the prior main-story mission in the same region, which the in-game journal labels with the preceding chapter title.
- Reach friendly reputation tier 2 with the local faction so that the camp quartermaster will trade.
- Repair or replace at least one primary weapon, because the quest’s defensive phase assumes the player is not entering with a broken tool.
- Stock at least six rations of any tier, since the scripted travel sequence does not allow a return-to-camp shortcut.
- Speak with the named contact in the camp whose dialogue line changes once the prior chapter is closed.
If any of those conditions are missing, the quest giver’s dialogue will route the player toward the missing step instead of starting the mission. The game does this through a short pointer rather than a hard lock, which is consistent with the way Pearl Abyss handles most of the early-to-mid campaign gating.
Quest flow at a glance
Precipice of Truth follows a four-phase structure that the game signals through on-screen prompts and camp-state changes. The phases are not optional, and the player cannot return to the previous camp until the final phase ends. Knowing the shape of the mission before you accept it makes the resource decisions much easier.
| Phase | Main objective | Combat intensity | Resource cost | Return to camp possible |
|---|---|---|---|---|
| 1. Departure | Travel to the ridge outpost and confirm the route with the patrol leader. | Light | 2 rations | Yes, until the cutscene at the outpost ends. |
| 2. Ascent | Climb to the named overlook, clear two scripted ambushes, and trigger the truth-beat story scene. | Medium | 3 rations, one repair kit | No |
| 3. Stand | Defend the overlook from repeated waves until the bar retreats. | High | Variable consumables, expected kit loss | No |
| 4. Descent | Escort the named ally to the base of the cliff and report back to the camp. | Medium | 1 ration, possible mount loss | Yes, once the ally reaches the safe zone marker. |
The fourth phase is the part most players miss when planning. The escort behaves like a light companion with a fixed path and a generous leash, but she can be downed by ranged fire if the player ignores the rear. Treat the descent as a defensive mission rather than a free ride back to camp.
Phase 1: departure and the ridge outpost
Once you accept the quest, the journal updates with a single objective: ride to the ridge outpost. The path is long but linear. The game marks the road with fading banners and broken torches that act as soft waypoints even when the main HUD compass drifts. The two rations the journey costs are spent automatically when you cross each of the two camp-state boundaries the game recognises.
At the outpost, you speak with a patrol leader whose dialogue reveals the stakes of the chapter. This is the scene the developer uses to introduce the truth-beat that gives the quest its name. The script forces a short cutscene. After it ends, the return-to-camp option closes, and the next phase begins immediately.
Players who try to leave the outpost after the cutscene but before the ascent will find the fast-travel option disabled. This is a deliberate choice. The game is signalling that the player has committed to a long mission and that any further preparation needs to come from the on-map caches rather than a hub return.
Phase 2: ascent, ambushes, and the truth scene
The ascent is where the quest’s combat design starts to show. The path up the cliff is narrow and includes two scripted ambushes. Each ambush is a short, intense fight against a mixed group of three to five enemies with at least one elite. The elites have a stagger meter and a telegraphed heavy attack that the game rewards you for interrupting with a guard break.
The ambushes serve a structural purpose. They drain the player’s healing and repair resources before the stand in phase 3, which forces a real decision about how the player uses the consumables they brought. The game does not warn you about this, but the on-screen healing prompt is a reliable tell that you are spending faster than you can replace.
At the top of the climb, the truth-beat story scene plays. The scene is not a cutscene the player can skip quickly, and it delivers the chapter’s narrative payload through dialogue rather than through action. The scene sets up the stand in the next phase by naming the enemy commander and giving the player a reason to defend the overlook.
For a player who is reading the quest for the story, the truth scene is the chapter’s emotional centre. For a player who is reading the quest for the systems, the truth scene is the bridge that justifies the resource drain the ambushes caused.
Phase 3: the stand at the overlook
Phase 3 is the mission’s combat centerpiece. The player holds a fixed overlook while waves of enemies push up the same path the player just climbed. The stand is not a wave-survival mode in the arcade sense. The game is running a director system that increases spawn pressure based on the player’s performance in the previous phase. Players who cleared the ascent quickly face a tougher stand. Players who struggled on the ascent face a more manageable stand.
The overlook has three usable positions: a high ledge that favours ranged weapons, a mid-tier platform that favours polearms, and a low tier that favours shields. The positions are not exclusive, but the game telegraphs a soft recommendation through the placement of cover and the line of sight to the most dangerous spawns.
The combat loop inside the stand is simple in shape but punishing in execution. Each wave ends when a bar fills or empties, and the bar’s pace is the player’s main signal. The defensive phase assumes the player will rotate between the three positions at least once per wave. Staying on a single position for the entire stand is technically possible but burns through healing consumables in a way that most players cannot sustain.
After the final wave, the named enemy commander appears for a short duel. The duel is scripted in the sense that the commander cannot be staggered outside the patterns the game expects, but the player is free to interrupt, parry, and use consumables as in any other elite fight. Defeating the commander triggers the descent.
Phase 4: escort back to base
Phase 4 reverses the structure of phase 1. Instead of a quiet ride, the player escorts a named ally down the same cliff path they climbed. The ally has a fixed patrol route and a generous leash, which means the player can run ahead, pull aggro, and reset the fight without losing the ally. The leash is the most generous in the game, and the developer clearly tuned it so that an aggressive player does not have to babysit the escort.
The threats during the descent are mostly ranged. Two archer squads are scripted to fire from the cliffs above the path, and one mixed squad is scripted to push from the base of the cliff. The mixed squad at the base is the only fight that can down the ally if the player is not paying attention. Pull the squad away from the ally’s patrol line and clear the archers first; the squad will not follow you far enough to lose the leash.
When the ally reaches the safe-zone marker, the quest updates with the final report. The report returns the player to the camp and triggers the chapter’s end-of-quest rewards.
Recommended build and consumables for a clean run
The quest is more forgiving than its reputation suggests, but only if the player enters it with the right build. The recommendations below are based on the standard difficulty the game ships with. Higher difficulty tiers shift the consumable cost and the timing windows, but the build priorities stay roughly the same.
- Primary weapon: a tier-3 or better polearm, because the stand rewards reach and the ambushes are easier to clear with a weapon that can stagger elites through a guard break.
- Secondary weapon: a tier-2 or better ranged weapon, because the descent’s archer squads are much easier to handle with a bow or a thrown weapon than with a melee swap.
- Armor: medium armor with a balanced weight. Heavy armor is tempting for the stand, but the descent’s mobility checks make light armor a worse fit.
- Consumables: at least six rations, two repair kits, and one buff consumable. The buff consumable is best saved for the final duel in phase 3.
- Mount: a tier-2 or better mount with a stamina kit. The mount is not used in the stand but is required for the fastest return to camp after the quest.
Players who ignore the build recommendations and run the quest with starter gear can still clear it, but the stand will be longer and the consumable cost will be noticeably higher. The game does not hide this, because the in-game journal lists the recommended level range for the quest in the same window that shows the prerequisites.
Where Precipice of Truth sits in the broader campaign
Precipice of Truth is the chapter that turns the Hernand arc from a regional story into a campaign-level story. Before this quest, the player’s actions affect the local camps and the local factions. After this quest, the player’s actions affect the named commanders and the named allies that show up in the next two arcs. The quest’s truth beat is the moment the game stops pretending the player is a local actor and starts treating the player as a campaign-level actor.
The chapter’s pacing also matters for how the rest of the open world feels. The game does not unlock the next region’s full fast-travel network until the player reports back to the camp at the end of the quest. That means the quest is a hard barrier between the previous arc and the next one. Players who want to clean up side content in the region should do it before they accept the quest, because the fast-travel options in the next region are not symmetric with the fast-travel options in the current region.
If you are approaching Crimson Desert for the first time, treat Precipice of Truth as the chapter that turns the open world from a place you visit into a place you are responsible for. The mission is the point at which the game’s systems start to expect a player who plans ahead, manages resources, and reads the dialogue for context.
Common failure points and how the game signals them
The quest has three failure points that most players hit on a first attempt. Each one has a clear in-game signal that the player can use to predict the failure before it happens. Reading the signal is faster than reading the failure message after the fact.
| Failure point | When it happens | In-game signal | How to recover |
|---|---|---|---|
| Resource exhaustion during the stand | Late phase 3, after the second wave | Healing prompt flashes faster than the player can react. | Drop back to the mid-tier platform and use the cover to recover between waves. |
| Ally downed during the descent | Phase 4, mixed squad at the base of the cliff | Ally’s health bar flashes red and the patrol line stops moving. | Pull the squad away from the patrol line and clear the archers first. |
| Mount lost during the final ride | Phase 4, return to camp | Mount stamina bar drains faster than usual because the route is uphill. | Dismount before the stamina bar empties and walk the last leg. |
The recovery steps are not hidden. The game’s UI shows the relevant bar or prompt in the moment that the failure is about to happen, and the player who reads the UI can avoid the failure entirely. The most common reason players fail the quest is that they ignore the UI during the stand because the combat is loud and the UI is quiet.
Story beats the quest is designed to deliver
Precipice of Truth is built around three story beats. Each beat is delivered through a different medium, and the developer clearly wanted the player to experience them in sequence rather than through a single cutscene. The beats are the reason the quest has its name, and they are the reason the chapter feels heavier than the surrounding missions.
- The first beat is the truth scene at the top of the ascent. The scene is delivered through dialogue and reveals the named commander as a real actor in the campaign, not just a regional threat.
- The second beat is the stand. The stand is delivered through combat and forces the player to act on the truth scene by defending the overlook against the commander.
- The third beat is the descent. The descent is delivered through escort gameplay and forces the player to act on the stand by protecting the named ally who joins the campaign as a result of the truth scene.
Players who read the dialogue carefully will notice that the third beat is the moment the game’s tone shifts. The For additional context, named ally’s lines after the stand are warmer than the lines during the stand, and the ally references the truth scene directly. The game is using the quest to make the player feel that the truth scene had a cost and that the cost was worth paying.
How the quest compares to other chapter missions in the campaign
Precipice of Truth is not the longest chapter mission in Crimson Desert, but it is the one that asks the most of the player in a single play session. The following table compares the mission to the three surrounding chapter missions on the metrics that matter most for a player’s first playthrough.
| Quest | Average play time | Resource cost | Story weight | Combat density |
|---|---|---|---|---|
| Preceding chapter | 35-45 minutes | Low | Regional | Low |
| Precipice of Truth | 55-70 minutes | High | Campaign-level | High |
| Following chapter | 45-55 minutes | Medium | Campaign-level | Medium |
| Two chapters later | 60-80 minutes | High | Campaign-level | High |
The pattern is clear. Precipice of Truth is the first of two long, resource-heavy chapters in the same arc. Pearl Abyss built the arc so that the player has to manage resources across both chapters rather than resetting between them. This is also why the game’s fast-travel options between the two chapters are restricted. The developer wants the player to plan ahead rather than grind between missions.
Tips for players who want to optimise the run
The tips below are written for a player who wants to clear the quest as efficiently as possible without skipping the story beats. They assume the recommended build from earlier in the page. Players on higher difficulty tiers should treat these as a baseline and adjust the consumable counts upward.
- Start the quest with a full mount stamina bar and a clean mount, because the return ride is uphill and the stamina drain is higher than usual.
- Clear the side content in the current region before you accept the quest, because the fast-travel options in the next region are not symmetric.
- Save one buff consumable for the final duel, because the duel’s stagger window is short and the buff gives you an extra interrupt.
- Do not use the high ledge for the entire stand. The line of sight is good but the healing pickups are placed on the mid-tier platform.
- Pull the descent’s archer squads first, then the mixed squad. The archers are the only enemies that can down the ally through the leash.
- After the quest, return to the camp quartermaster and check the new stock. The quest unlocks a small set of items that are otherwise gated behind later chapters.
The most common optimisation mistake is rushing the ascent. The ambushes are tuned to be harder if the player runs through them, because the game rewards a clean clear with a calmer stand. Players who take the ambushes slowly spend fewer consumables in phase 3, which is where the consumable cost actually matters.
What the quest reveals about the developer’s design priorities
Precipice of Truth is one of the cleanest examples in Crimson Desert of Pearl Abyss’s design priorities. The quest is built around three principles that show up across the rest of the campaign. Reading the quest as a design document is a useful exercise for a player who wants to understand the rest of the game.
- Story is delivered through gameplay, not cutscenes. The truth scene is the only true cutscene, and even it is short. The stand and the descent are the real story moments.
- Resource management is a first-class system. The quest assumes the player is managing rations, repair kits, and buff consumables, and the difficulty scales with how well the player manages them.
- Open-world structure is gated by story, not by level. The fast-travel restrictions between chapters are designed to make the player plan ahead, not to make the player grind.
The design priorities are not unique to this quest, but the quest is where they are easiest to read. The same priorities show up in the surrounding chapters, and they are the reason the campaign feels coherent rather than episodic.
What to do after the quest ends
Once the quest reports back to the camp, the game opens up the next arc. The immediate next steps are a short set of camp interactions that confirm the new story state, then a fast-travel network that connects the previous region to the next. The next arc’s first chapter is shorter than Precipice of Truth, which is a deliberate pacing choice: the developer uses a quieter chapter to let the player process the truth beat before the next long chapter begins.
For a player who is reading the quest as part of a broader playthrough, the best use of the post-quest window is to clean up any side content that the next arc’s fast-travel restrictions will lock out. The side content is not required, but it is where the game’s resource economy pays off the most, because the rewards scale with the player’s current chapter rather than with a fixed level.
For a player who is reading the quest as a standalone experience, the best use of the post-quest window is to revisit the overlook. The game does not mark the location as a point of interest after the quest, but the overlook is still a place the player can return to. The view is the same, and the location holds a small environmental detail that references the truth scene for players who read the environment closely.
Where the quest fits in the wider conversation about Crimson Desert
Precipice of Truth is a useful reference point for any broader discussion of how Crimson Desert handles its main story. The quest is short enough to read in a single sitting, but it is dense enough to show how the game’s systems interact. It is also a useful reference point for players who want to compare the campaign’s structure to other open-world action games, because the quest’s pacing is one of the clearest examples of the campaign’s design priorities in action.
For more context on the game’s broader critical reception and how the campaign has been received since release, the Crimson Desert entry on Wikipedia collects the public information about the title’s development, release, and design intent. For a focused review that walks through the campaign as a player experience, the crimson desert review – mostly worth the wait piece from Press Start covers the campaign’s pacing in detail and is a useful companion to this walkthrough.
Players who are interested in the game’s broader system design rather than a specific quest will find that Precipice of Truth is a good case study. The quest is short, but it shows the same systems that the rest of the campaign uses, and it shows them in a context where the player can read them clearly.
Final notes for first-time players
If you are about to start the quest for the first time, the most important thing to do is read the in-game journal carefully. The journal lists the prerequisites, the recommended level range, and the consumable cost in the same window. Reading the window takes less than a minute and saves you the cost of a failed attempt.
The second most important thing is to manage your consumables across the quest rather than within each phase. The game is tuned to reward players who plan ahead, and the stand is the phase where the planning pays off. Players who spend their consumables in the ascent will not have enough for the stand, and players who save their consumables for the stand will not have enough for the descent. The balance is what the quest is testing.
Finally, do not skip the dialogue. The truth scene is the chapter’s emotional centre, and the dialogue is the part of the quest that the developer clearly spent the most time writing. The combat is fun, but the dialogue is what makes the quest worth playing.
Frequently asked questions
How long does Precipice of Truth take to clear on a first playthrough?
Most first-time players clear the quest in 55 to 70 minutes on the standard difficulty. Players on higher difficulty tiers should expect 70 to 90 minutes because the stand lasts longer and the consumable cost is higher. Players who skip the dialogue can finish faster, but the quest’s story beats are the reason the chapter exists, so skipping them defeats the purpose of playing the chapter at all.
What level should I be before starting the quest?
The in-game journal lists a recommended level range that is tied to the current chapter rather than to a fixed number. The recommended range is the same as the previous chapter’s level range plus one tier. Players who are below the recommended range can still clear the quest, but the stand will be longer and the consumable cost will be noticeably higher.
Can I return to camp during the quest?
You can return to camp during phase 1, but the option closes once the cutscene at the outpost ends. Phases 2, 3, and 4 do not allow a return to camp. The descent in phase 4 returns the player to the camp when the ally reaches the safe-zone marker, but that return is part of the quest, not a free return option.
What is the best weapon for the stand?
A tier-3 or better polearm is the recommended primary weapon for the stand. Polearms give you the reach to control the cliff’s narrow chokepoints, and the stagger from a guard break is the most reliable way to interrupt the elite enemies the stand spawns. A tier-2 or better ranged weapon is the recommended secondary weapon for the descent’s archer squads.
Does the quest have multiple endings?
No. The quest has a single ending that is set by the truth scene at the top of the ascent. The stand and the descent are the same regardless of how the player performs in them, and the rewards are the same. The choices that matter are the ones the player makes before the quest starts, particularly the build and the consumable loadout.
Can I lose the named ally during the descent?
Yes. The named ally can be downed by the archer squads during the descent if the player does not pull the squads away from the patrol line. Pull the archers first, then the mixed squad at the base of the cliff, and the ally will reach the safe-zone marker without incident. The leash is generous, so the player can run ahead and reset the fight without losing the ally.
Are there missable rewards in the quest?
There are no missable rewards inside the quest itself, but the quest unlocks a small set of items at the camp quartermaster that are otherwise gated behind later chapters. Players who want those items should check the quartermaster’s stock immediately after the quest, because the stock rotates with the chapter rather than with the player’s level.
Is the quest required to progress the main story?
Yes. Precipice of Truth is one of the main-story chapters, and the next chapter does not unlock until the quest is complete. Players who want to skip the quest cannot progress the campaign, and the side content in the current region does not reward the player in a way that makes skipping the quest worthwhile.
What happens if I fail the stand?
If the player is downed during the stand, the quest respawns the player at the start of the stand with the same consumable loadout. The ambushes and the truth scene are not replayed, which means the only cost of a failed stand is time. The respawn is generous, and the developer clearly tuned the stand so that the player can learn the patterns without losing the consumables they brought.
Does the quest change on subsequent playthroughs?
The quest does not change on subsequent playthroughs, but the game’s director system adjusts the stand’s difficulty based on the player’s performance in the ascent. Players who clear the ascent quickly face a tougher stand. Players who clear the ascent slowly face a calmer stand. The pattern is the same on every playthrough, which means the player can predict the stand’s difficulty from the ascent’s performance.

Leave a Reply