

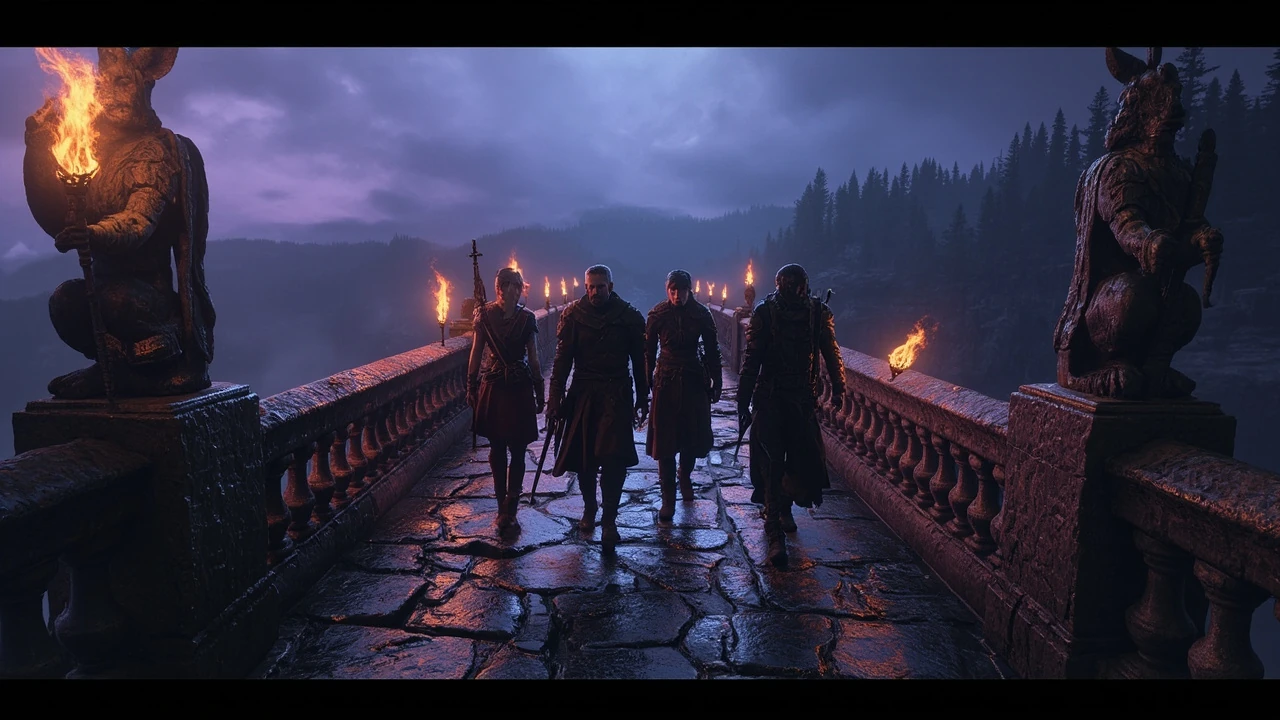
BG3 walkthrough: how to plan a clean first run without locking yourself out
A useful BG3 walkthrough does not hand you every dialogue option or spoil every twist. What it gives you is a reliable spine: the order in which to tackle each region, the decisions that cannot be reversed, and the side content worth detouring for before the story forces you forward. Baldur’s Gate 3 is layered with overlapping systems, and the difference between a smooth campaign and a frustrating one usually comes down to a handful of choices made in the first act that quietly reshape the next forty hours.
This guide focuses on the planning side of a BG3 walkthrough rather than narrative summary. It maps the three acts, explains how quest branches connect, flags decisions with lasting consequences, and offers practical advice on party composition, combat encounters, and resource management. The goal is to help you complete the game with the ending you actually want while still feeling like you discovered it yourself.
If you are already deep into a save and only need a specific fix, jump to the act section you are stuck in or scan the FAQ. Otherwise, read the preparation advice first, because the choices you make before character creation finishes ripple through every quest in the game.
Before you start: build decisions that shape the whole BG3 walkthrough
Baldur’s Gate 3 is built on Dungeons and Dragons 5th Edition rules, but the experience is closer to an open-world RPG than a strict dungeon crawl. The prologue ship is a tutorial, but it also seeds the central conflict of the game and locks in your starting class, race, and origin. The decisions you make in the first hour affect dialogue options, available party members, and even which endings are reachable later.
Race, class, and origin selection
Race and class are not cosmetic. They change which dialogue checks your character can attempt, which equipment interacts with your abilities, and how certain companions react to you. The Origin system is the most important early choice: you can play as a custom character or as one of the seven origin companions, each with their own personal quest and unique interactions.
- Custom character: maximum flexibility for build planning, no preset personality, fewer unique dialogue lines with companions.
- Origin character: personal quest runs alongside the main story, more dialogue reactivity, but the build is partially fixed.
- Race choice: affects racial abilities, available subraces, and a handful of dialogue options. Drow, Githyanki, and Half-Elf open more unique lines than Human or Half-Orc.
- Class choice: determines your combat role, spell progression, and which party slots you can fill later.
Companion recruitment priority
Your party can hold four members including yourself. The game offers roughly ten recruitable companions, and you cannot experience all of their personal quests in a single playthrough without modding. A practical BG3 walkthrough recruits the companions that synergize with your class and the choices you intend to make in act two.
Difficulty, honor mode, and save discipline
BG3 has four difficulty settings. Explorer trims combat and lets you focus on story. Balanced is the intended default. Tactician adds stronger enemies and smarter AI. Honor mode adds a single save, no respecs, and a permadeath mechanic on top of Tactician. Whatever you pick, a disciplined save routine is more important than the slider itself: the game autosaves at story beats, but manual saves before every major decision protect you from dialogue rolls and ambush outcomes.
Act 1 walkthrough: the Road, the Grove, and the first impossible choice
Act one takes place around the Sword Coast, primarily the area around the Druid Grove and the goblin stronghold at the Shattered Sanctum. It functions as a tutorial and a soft open-world region. The map is smaller than the acts that follow, but the quest density is the highest in the game, and most of the decisions that ripple forward are made here.
Recommended route through the Wilderness
A useful BG3 walkthrough treats act one as a hub with three major locations: the Druid Grove, the Shattered Sanctum, and the Rosymorn Monastery. The game does not force a path, but each location offers quests that gate later content. A clean order reduces backtracking and keeps your party at a manageable level for each encounter.
Key decisions in act one
There are three decisions in act one that cannot easily be reversed. The first is the choice between helping the Druid Grove’s defenders or siding with the goblin leaders. The second is whether to free or condemn the prisoner you encounter in the Shattered Sanctum. The third is how you resolve the conflict with the tiefling refugees, because their fate affects which NPCs appear in act two and which traders are available.
Combat encounters that catch players off guard
Act one is not a tutorial in difficulty. Several encounters, especially the ambush near the chapel and the duel with the paladins outside the Shattered Sanctum, are balanced around level four parties with at least one healer. If you find yourself wiped repeatedly, the issue is usually party positioning and action economy rather than raw damage output.
| Encounter | Recommended level | Common mistake | Walkthrough fix |
|---|---|---|---|
| Ambush at the chapel ruins | 3-4 | Focusing the caster first turn | Kill the archers, control the caster with crowd control, finish the survivors |
| Paladins of Tyr | 4 | Engaging in the open | Use high ground, line of sight chokepoints, and pre-buff before dialogue ends |
| Goblin leadership | 4-5 | Fighting all three leaders at once | Pick off one leader with stealth, then mop up the other two |
| Ettercap tunnels | 3-4 | Ignoring web terrain | Burn webs with fire, save ranged attacks for the ettercap boss |
Optional regions that change your level curve
Two optional regions in act one shift the level curve: the Underdark and the Mountain Pass. The Underdark gives a level or two of experience and unique gear, and the Mountain Pass opens the Githyanki creche, which feeds into Lae’zel’s personal quest. A first run that ignores both regions typically enters act two one level under the recommended threshold, which is why some fights in the Shadow-Cursed Lands feel unfair. A walkthrough that values pacing should route through at least one of the two.
Act 2 walkthrough: the Shadow-Cursed Lands and the choice that defines your ending
Act two moves the party into the Shadow-Cursed Lands, a large region dominated by a magical darkness and a central town built around a victim of the curse. The act is the most linear in terms of narrative progression, but the quest graph is still wide, and a careless decision here can lock you out of an entire companion’s questline.
Surviving the Shadow-Cursed Lands
The curse is not just visual. It applies stacking necrotic damage to any party member exposed to it without light. A practical BG3 walkthrough treats light sources as mandatory equipment. The good news is the game offers several solutions: protected lanterns, the spell Daylight, the cantrip Light on a weapon or shield, and certain consumables. The Moon Lantern acquired near the start of the act is the most reliable source, and the game subtly penalizes players who try to brute-force the region with torches alone.
The Nightsong and the Gauntlet of Shar
The Gauntlet of Shar is a long dungeon that tests the party’s resource management. The Nightsong at the end is one of the most important quest pivots in the game. Your decision about her fate affects an entire major character arc, the loyalty of a major companion, and the resources you have available for the final act. A walkthrough should treat this as a planning checkpoint, not a throwaway side quest, because every path through the Gauntlet branches the ending differently.
The point of no return
Act two ends with a forced cinematic that advances the story whether you are ready or not. The game warns you, but it does not give you a second chance to leave. Before you trigger the point of no return, finish companion conversations, complete any marked personal quests, and check that your inventory is stocked with scrolls, potions, and camp supplies. The transition also interrupts long rest cycles, so a final rest before the cinematic is worth more than it looks.
| Act 2 priority | Why it matters | What to check before the point of no return |
|---|---|---|
| Companion personal quests | Some companions leave or die if unresolved | Talk to each companion, trigger their unique dialogue, resolve their marked quest |
| Trader inventories | Several vendors leave the region after the point of no return | Stock up on arrows, scrolls, and camp food |
| Quest items with area effects | Some items trigger events when carried past the threshold | Decide which items to keep, stash, or use |
| Long rest timing | The transition interrupts the rest cycle | Long rest at camp to refresh spells before the final dungeon of the act |
Act 3 walkthrough: the city, the counting house, and three endings
Act three drops the party into the Lower City of Baldur’s Gate, the largest map region in the game. The act is dense, the quest count is high, and the game presents a long string of decisions that determine which ending you unlock. A good BG3 walkthrough here is really a decision planner, because route order matters less than the order in which you resolve the major quest branches.
Navigation and pacing
The Lower City is split into districts, each with its own quest cluster. The main quest line pulls you toward the city cemetery, the counting house, and finally the docks. Side quests include the murder investigation, the underground temple, the upper city, and a smuggler ring. There is no single correct order, but a useful BG3 walkthrough batches quests by district to reduce travel time and to keep related clues close to each other in the journal.
Major quest branches in act three
Three major decisions shape the ending: the choice of leadership for the city, the resolution of the central antagonist’s fate, and the personal resolution of your character’s chosen companion. Each decision has multiple paths and several pieces of evidence hidden in the world. Skipping dialogue or skipping side content reduces the information available to make a deliberate choice, and the game quietly punishes players who rush the act with one of the less satisfying endings.
Combat escalation in the final act
Encounters in act three are balanced for level 11-12 parties. The final confrontation assumes your party has good area-of-effect damage, a working save setup, and at least two reliable healers. A character that is behind the curve on gear or level will still struggle, even with good tactics, and the gap between a level 11 party and a level 12 party shows up most clearly in the second phase of the final boss.
- Level target: 12 by the final boss, 11 minimum
- Healer count: two dedicated healers, or one healer plus heavy potion usage
- Crowd control: at least one caster with battlefield control spells
- Single target damage: at least one character built for boss damage
- Save before each branch: the game has more than a dozen possible ending combinations
Quest branches that change the ending: how to plan the last act
The For additional context, ending of Baldur’s Gate 3 is not a single scene. It is a sequence of choices that combine into a final outcome, and the game’s branching design rewards players who treat each branch as a separate decision rather than a single dramatic moment. A BG3 walkthrough that treats the ending as one final decision misses how the system actually works. Plan each major branch separately and let the combination determine your playthrough.
The antagonist’s fate
The main antagonist can be confronted and either killed, persuaded to stand down, or transformed through a specific path that requires gathering evidence and a special quest item. Each path requires different party preparation. The persuasion path needs high charisma and a specific dialogue check. The transformation path requires a unique item found only in one location. A walkthrough that wants to see all three in a single run is possible, but it requires saving before each branch and committing to a deliberate order of dialogue checks.
The city’s leadership
The choice of who leads the city in the wake of the conflict determines several long-term outcomes. The candidates are not all available in a single playthrough. Several candidates die or are removed based on earlier decisions, so a clean run requires confirming the candidates are still alive before the final chapter. The game also rewards players who resolve candidate side quests early, because the late-game evidence is gated by act two progress.
The companion resolution
Each major companion has a personal quest that resolves during the final act. The resolution of that quest, combined with your relationship and dialogue choices, determines whether the companion appears in the epilogue, dies in the final battle, or leaves the party earlier. A run that ignores companion quests usually ends with fewer epilogue scenes and a more limited ending sequence, which is one reason first-time players often feel the finale is shorter than expected.
| Decision | Paths available | Prerequisite | Lockout risk |
|---|---|---|---|
| Antagonist fate | Kill, persuade, transform | Evidence item, high charisma, or unique quest | Low, all three paths reachable in one run with planning |
| City leadership | Four candidates | Resolve their personal quests in act two or three | High, two candidates can die in act two |
| Companion resolution | Romance, friendship, or conflict | Personal quest progression, key dialogue choices | Medium, conflict path locks romance scenes |
| Origin resolution | Custom or origin-specific ending | Origin choice in character creation | Locked at character creation |
Party composition: a practical BG3 walkthrough approach
Party composition in BG3 is more forgiving than in most tactical RPGs because the game is balanced for mixed roles. A typical run includes a tank, a damage dealer, a healer, and a utility caster. The exact classes matter less than the role coverage. A BG3 walkthrough should treat the party as a flexible system rather than a fixed template, and the same composition that clears the Underdark can usually clear the Lower City with only minor gear adjustments.
Role coverage matrix
Use the following matrix as a planning tool. Each row is a role, and each column is a common class that can fill it. The marks indicate how well a class covers the role at level 12, when most of the final act plays out.
| Role | Fighter | Cleric | Wizard | Rogue | Barbarian | Druid | Bard | Paladin |
|---|---|---|---|---|---|---|---|---|
| Tank | Strong | Medium | Weak | Weak | Strong | Medium | Weak | Strong |
| Damage dealer | Strong | Medium | Strong | Strong | Strong | Medium | Medium | Strong |
| Healer | Weak | Strong | Weak | Weak | Weak | Strong | Medium | Medium |
| Utility caster | Weak | Strong | Strong | Weak | Weak | Strong | Strong | Medium |
| Skill monkey | Weak | Medium | Medium | Strong | Weak | Medium | Strong | Medium |
Starter party by playstyle
- Balanced: Custom Fighter, Shadowheart (Cleric), Astarion (Rogue), Gale (Wizard). Covers tank, healer, skill monkey, and damage caster with minimal overlap.
- Spell-heavy: Custom Sorcerer, Shadowheart, Gale, Wyll. Strong crowd control, weaker melee, requires good positioning.
- Melee focus: Custom Paladin, Karlach (Barbarian), Lae’zel (Fighter), Shadowheart. High damage, lower utility, vulnerable to ranged enemies.
- Stealth and dialogue: Custom Bard, Astarion, Wyll, Gale. Relies on dialogue checks, weaker in straight combat, strong in exploration.
When to swap a party member mid-run
Party swaps are not required, but a smart BG3 walkthrough considers them at two points: the transition into act two, when the Shadow-Cursed Lands rewards classes with light-related abilities, and the transition into act three, when the Lower City’s social checks favor charisma-heavy parties. The game makes swaps cheap via Withers at camp, and the cost of leaving a companion behind for a region is usually lower than the cost of forcing the wrong role into the wrong dungeon.
Combat tactics that hold up across all three acts
Baldur’s Gate 3 uses a turn-based system with action economy as the dominant lever. Most fights are not won by raw damage, they are won by controlling the order in which enemies can act. A BG3 walkthrough should leave you thinking about the turn order, not the damage numbers, and the same handful of habits covers most encounters from the chapel ambush to the docks.
Action economy fundamentals
Each character gets an action, a bonus action, a movement allowance, and a reaction. Enemies follow the same rules. The team that ends the first round with more actors than the opponent usually wins the fight. Crowd control spells that take enemies out of the action economy are worth more than a slightly higher damage spell, which is why a level 3 Hold Person often decides a fight faster than a level 3 Fireball against a single target.
High ground and line of sight
The game rewards elevation with a damage bonus on ranged attacks. It also punishes exposure through line of sight rules. Most fights can be repositioned in the first turn to give your party high ground, break enemy line of sight, or force enemies to path around obstacles. A few seconds of setup often saves a round of healing, and the difference between a clean fight and a near-wipe is usually a single repositioning move on round one.
Crowd control priorities
Every combat encounter has one or two enemies that swing the fight. The crowd control priority list is usually: healers, casters, ranged damage, then melee damage. Identifying the priority target in the first turn is more important than any build optimization, and players who default to attacking the nearest enemy usually spend the rest of the fight recovering from a missed control opportunity.
Resource management across the day
Long rests are limited by the supply of camp food and the story pacing. A BG3 walkthrough that long rests after every fight plays smoothly but runs out of resources in act three, when camp food becomes scarce. A run that uses short rests, scrolls, and consumables to stretch resources lasts longer and has more firepower for the final dungeon. The discipline of rationing spell slots is the single biggest difference between a Balanced run and a Tactician run.
Exploration and loot: practical advice for the three maps
Each act has a different map design. Act one is a tutorial hub. Act two is a curved route through a hostile region. Act three is a large city with vertical layers. The exploration advice differs for each, and the loot priorities shift with the encounter design.
Act one exploration
The Wilderness and the roads around the crash site are small, and every side path leads to a quest. The risk is over-exploration, which can push your party into encounters above its level. A BG3 walkthrough that is finishing act one under-leveled usually means the player skipped the Underdark. Loot priority in act one is simple: pick up every weapon, because act two vendors stop selling common gear.
Act two exploration
The Shadow-Cursed Lands are wide, and the light mechanics make travel slow. Plan routes around safe houses, light sources, and fast travel points before moving between sub-regions. Side content here is heavy on dungeon crawls and puzzles, so bring a character with high perception and trap detection. Loot priority in act two shifts to consumables: scrolls, potions, and camp supplies matter more than weapons, because vendors rotate stock between regions.
Act three exploration
The Lower City rewards vertical thinking. Rooftops, sewers, and cellars all hide quests, traders, and shortcuts. The map is too large to clear on foot, so the fast travel system in the city is the single most important tool for keeping the act moving. Loot priority in act three is unique gear: quest rewards and boss drops outscale anything a vendor sells, and gold is best spent on consumables and identification scrolls rather than weapons.
- Act one: clear every marked side quest before leaving the region, because the region locks after act one.
- Act two: always travel with a light source and a backup light source.
- Act three: unlock the fast travel points as you find them, not at the end of the act.
- All acts: talk to every companion at camp after each major quest, because personal quest progression is gated by dialogue.
Common mistakes that derail a BG3 walkthrough
Most first runs hit one of the same walls. The fix is usually small, but the symptom can feel like the game is broken. This section lists the recurring mistakes and the practical fix for each, based on the patterns that show up most often in community troubleshooting threads and on the in-game journal’s most common warning states.
Skipping long rest conversations
Long rests at camp trigger companion conversations, dream sequences, and the only chance to advance several personal quests. Players who skip camp conversations for efficiency miss entire companion arcs. The fix is to set a rule: after every two or three combat encounters, return to camp and trigger the long rest dialogue. The camp also handles camp food, which gates how often long rests are available in act three.
Ignoring the journal and quest log
Baldur’s Gate 3 has a deep journal system that tracks every quest, including hidden steps. Players who rely on memory miss optional objectives and lock themselves out of better outcomes. A practical BG3 walkthrough uses the journal actively, checking objectives before each major dialogue and reopening finished quests to check for follow-up steps the game does not surface in the quest log.
Selling quest items
Several items in the game look like vendor trash but are required for quest completion. The game does not warn you. The fix is to send unidentified or unusual items to camp storage first, then revisit the vendor later once you know the item is not flagged. This habit saves more runs than any other single piece of advice, because the act two and act three vendors offer tempting gold payouts for items that are actually progression-locked.
Respec mistakes in act three
Withers offers a respec in camp. Players who respec at level 12 to fix a build find that the new build has not had time to gather key equipment. A BG3 walkthrough that respects the respec system uses Withers early in act three, not at the end of it, because gear drops in the Lower City are tied to class-restricted vendors and the respec window closes fast.
Triggering the point of no return unprepared
The act two cinematic is the most common save-loss event in the game. Players enter the Shadowfell, advance the cinematic, and lose access to two traders, three companion questlines, and half of the region’s fast travel network. The fix is to plan a checklist before the cinematic: companion quests, trader runs, camp food, and a long rest. The checklist takes ten minutes and prevents the most common reason players finish act two feeling locked out of content.
How to use this BG3 walkthrough with modded or patched runs
Baldur’s Gate 3 supports mods and receives regular patches. Both can change the assumptions of any walkthrough. A good walkthrough should still hold up, but the specific numbers and quest triggers may move, and the safest way to use a guide across versions is to treat the structure as the load-bearing part and the specific values as the part that ages fastest.
Patch awareness
Hotfix patches can change NPC behavior, quest triggers, and exploit fixes. The big content patches are rarer but can rework entire questlines. If you are playing on a specific patch, check the patch notes before relying on a specific walkthrough detail, especially around companion approval thresholds and boss behavior in the final act.
Mod compatibility
Mods that change combat math, encounter design, or class balance will shift the difficulty curve. Mods that add classes or subclasses usually do not affect the walkthrough structure. Cosmetic mods do not affect anything. The safest approach is to keep a clean save of the unmodded game as a fallback, because some mod conflicts only appear in act three when the quest graph is at its densest.
Splitting the party intentionally
Some quests reward splitting the party, sending one or two characters to a side objective while the rest handle the main encounter. The game supports this through the split command, but it is risky in fights. A BG3 walkthrough that wants to use split tactics should reserve it for dialogue and exploration, not for combat, and the game punishes careless splits in the Lower City ambushes that rely on surprise rounds.
Frequently asked questions
How long does a Baldur’s Gate 3 run take with a walkthrough?
A typical BG3 run takes between 60 and 110 hours depending on exploration style and difficulty. A player who follows a walkthrough and skips optional content finishes around 70 hours. A player who explores everything and pursues every companion quest pushes past 100 hours. The length is heavily influenced by dialogue pacing, because the game has thousands of lines and most of them are voiced, and by how often the party triggers long rest conversations at camp.
Can I use a BG3 walkthrough on Tactician or Honor mode?
Yes, but the role of the walkthrough shifts. On Balanced, it acts as a route guide. On Tactician, it acts as a combat primer. On Honor mode, it acts as a save discipline guide, because the single-save rule makes every decision permanent. The walkthrough structure here applies to all three, but the level recommendations and combat tips matter more on harder modes, and Honor mode in particular rewards players who plan every long rest.
What level should I be for the final boss?
Level 12 is the recommended level for the final confrontation, with 11 being a hard floor. The final dungeon has trash encounters tuned for level 11 parties, and the boss itself assumes level 12. Going under-leveled usually means running out of resources before the second phase of the fight, and the game gives no catch-up mechanic in the final act, so the level curve has to be respected.
Can I save before major decisions and reload?
Yes, and you should. Manual saves before each major dialogue give you the freedom to explore multiple outcomes without locking in a single one. The game does not punish saving or reloading, and the autosave system is not always placed where you need it. Most players keep a small rotation of five to ten manual saves for the final act alone.
Are there decisions I cannot reverse even with a save?
Some decisions are gated by the world state, not the save file. If an NPC dies because of a story trigger, reloading restores them, but if the story advanced past that trigger in a way that the world cannot represent, the decision is locked for that playthrough. A BG3 walkthrough flags these moments so you can save beforehand, and the act two cinematic is the single most common place where a save cannot undo what the world has already changed.
Does a BG3 walkthrough spoil the story?
A well-written BG3 walkthrough is a route guide, not a script. It points you at the right region, flags the decisions that have weight, and explains the systems around the story. It does not need to recite every line. If you want a clean first run, focus on the route and decision lists rather than the dialogue walkthroughs, and let the companion dialogue at camp do the heavy lifting for character moments.
Can I recruit all companions in a single run?
No. The party holds four members, and several companions leave, fight, or die based on decisions made in act two. A single run can recruit and finish the personal quests of around three to five companions. The remaining companions require additional runs with different choices, which is one reason the game has the kind of replay value that justifies a second file rather than a single optimized save.
What happens if I ignore a companion’s personal quest?
The companion stays in the party but their personal story does not progress. The epilogue treats unresolved personal quests as incomplete, and the ending sequence has fewer scenes. Mechanically, the game is still completable, but narratively the run feels lighter, and the game explicitly reduces the number of camp conversations for companions whose arcs are stalled.
Is it worth doing a BG3 walkthrough on a second playthrough?
A second run is usually where the deeper endings appear. The first run handles the main story. The second run handles the consequences of the first run’s choices, picks up the companion arcs that were missed, and explores the alternative endings. A walkthrough on the second run can be much more focused, because the route through the three acts is already familiar and the planning shifts toward dialogue and ending combinations.
Where do I find the BG3 walkthrough for a specific act?
This guide covers the structure of all three acts. For act-specific deep dives, the official community forums and the in-game journal are the best sources. The journal lists every active objective and the steps required to complete it, which is often enough to recover from a stuck point without leaving the game. The structure of the game, including its development history and release context, is summarized in the Baldur’s Gate 3 Wikipedia article, which is a useful reference for cross-checking quest names and patch history.
A BG3 walkthrough is less about the script and more about the rhythm. The game rewards planning, dialogue attention, and patient combat. Run a clean first pass, save often, and let the second run be the one where you optimize for the ending you actually wanted.

Leave a Reply